Driver:Amstrad:HD20 install: Difference between revisions
| (6 intermediate revisions by the same user not shown) | |||
| Line 34: | Line 34: | ||
Note that this assumes you are using 128k RAM or more, so the cpc6128 driver is used. | Note that this assumes you are using 128k RAM or more, so the cpc6128 driver is used. | ||
==== Create a blank 3" floppy disk, to be used as a CP/M work disk ==== | ==== ''Create a blank 3" floppy disk, to be used as a CP/M work disk'' ==== | ||
Boot the CPC driver, with the HD20 expansion enabled, and the just created HD image mounted. | Boot the CPC driver, with the HD20 expansion enabled, and the just created HD image mounted. | ||
| Line 46: | Line 46: | ||
[[File:hd20_fdformat.png|center]] | [[File:hd20_fdformat.png|center]] | ||
==== Make the disk bootable ==== | ==== ''Make the disk bootable'' ==== | ||
First, mount the CPM 2.2 master disk via MAME's File Manager. Then, at the Ready prompt, type '''|syscopy,1,1''' and press Enter. | First, mount the CPM 2.2 master disk via MAME's File Manager. Then, at the Ready prompt, type '''|syscopy,1,1''' and press Enter. | ||
| Line 55: | Line 55: | ||
bootable. | bootable. | ||
==== Copy some CP/M and HD utilities to the work disk ==== | ==== ''Copy some CP/M and HD utilities to the work disk'' ==== | ||
Mount the CP/M 2.2 master disk, and also mount our work disk in the second disk drive, and boot | Mount the CP/M 2.2 master disk, and also mount our work disk in the second disk drive, and boot | ||
| Line 66: | Line 66: | ||
'''pip b:=sysgen.com''' | '''pip b:=sysgen.com''' | ||
==== Copy utilities and driver from the HD interface disk to the work disk ==== | ==== ''Copy utilities and driver from the HD interface disk to the work disk'' ==== | ||
Mount the work disk in the first disk drive, and the HD interface disk in the second drive. Then enter each of the following commands:<br/> | Mount the work disk in the first disk drive, and the HD interface disk in the second drive. Then enter each of the following commands:<br/> | ||
| Line 74: | Line 74: | ||
'''pip a:=cpm63.sys''' | '''pip a:=cpm63.sys''' | ||
==== Update the work disk to use CPM63.SYS ==== | ==== ''Update the work disk to use CPM63.SYS'' ==== | ||
Restart MAME without the HD20 enabled, and mount the CP/M 2.2 master disk, and boot it using '''|cpm,1''' at the Ready prompt. | Restart MAME ''without'' the HD20 enabled, and mount the CP/M 2.2 master disk, and boot it using '''|cpm,1''' at the Ready prompt. | ||
Now mount the work disk, and enter '''writesys cpm63.sys''' at the A> prompt. | Now mount the work disk, and enter '''writesys cpm63.sys''' at the A> prompt. | ||
| Line 88: | Line 88: | ||
No disk swapping needed. :) | No disk swapping needed. :) | ||
Enter the following commands at the A> prompt:<br/> | |||
'''movcpm 255 *'''<br/> | |||
'''save 34 cpm63.com''' | |||
Now enter '''ddt cpm63.com''' and then at the '-' prompt, type '''s1e0c''' and press Enter. | |||
Now you must enter the string of bytes to edit. | Now you must enter the string of bytes to edit. | ||
| Line 102: | Line 100: | ||
3a 04 00 e6 0f 32 42 ee 2e 80 cd 0b f8 | 3a 04 00 e6 0f 32 42 ee 2e 80 cd 0b f8 | ||
Now type a '.' and press Enter to stop editing | Now type a '.' and press Enter to stop editing, then at the '-' prompt, type g0 and press Enter. | ||
[[File:hd20_ddt.png|center]] | [[File:hd20_ddt.png|center]] | ||
Type '''sysgen *''' and press Enter. | |||
When asked for the destination disk, press Enter. | When asked for the destination disk, press Enter.<br/> | ||
When asked for the system disk, pause, and then mount the CP/M 2.2 master disk. | When asked for the system disk, pause, and then mount the CP/M 2.2 master disk. (Or you can just press Enter and let it crash). | ||
(Or you can just press Enter and let it crash). | |||
Now you can reset the system, and boot from the work disk with '''|cpm,1'''. | Now you can reset the system, and boot from the work disk with '''|cpm,1'''. | ||
=== Partitioning and formatting the hard disk === | |||
Boot from our CP/M 2.2 work disk (HDFORMAT.COM does not appear to work under CP/M Plus), | |||
with the HD20 enabled, and hard disk image mounted. | |||
At the A> prompt, type '''hdformat''', and press Enter. You will be given the option of doing a low-level format, a high-level format, or quit. | |||
First press L to do a low-level format. This creates the partition table, providing four | |||
5MB partitions (both X-DDOS and CP/M refer to them as drives D, E, F and G). | |||
Press Y to confirm, and then Space to create the partition table. | |||
Next, press H to do a high-level format, press D to format drive D, then Y to confirm, and | |||
then Space to start formatting. Repeat this for each of the drives, then press Q to quit. | |||
{| | |||
|[[File:hd20_hdformat.png|384px|center]] | |||
|[[File:hd20_hdformat_2.png|384px|center]] | |||
|} | |||
Now you can test it by copying some files to drive D. Resetting the system to go back to | |||
BASIC, you should be able to list files you copied by entering |dir,"d:", and it should report | |||
about 5MB of free space. | |||
[[File:hd20_dir.png|center]] | |||
Latest revision as of 02:31, 19 January 2017
Setting up the Dobbertin HD20
Creating a blank hard disk image
Create a blank HD image file using chdman:
chdman createhd -o <output CHD file> -chs 615,4,17 -c none
chdman - MAME Compressed Hunks of Data (CHD) manager 0.179 (mame0179-616-g0d17e0f-dirty)
Output CHD:   <output CHD file>
Compression:  none
Cylinders:    615
Heads:        4
Sectors:      17
Bytes/sector: 512
Sectors/hunk: 8
Logical size: 21,411,840
Running MAME
With the HD20 active:
mame cpc6128 -exp hd20 -hard1 <path to CHD> -upd765:1 3ssdd
Without the HD20 active:
mame cpc6128 -upd765:1 3ssdd
(-upd765:1 3ssdd is used to set drive B to a 3" single-sided drive, this is to lessen disk swapping, which is annoying to do at times in MAME's UI)
Setting up CP/M 2.2
Requires:
- CP/M 2.2 Master disk (software list: cpmplusu01:flop4)
- Dobbertin HD Interface driver disk (not in software list)
Note that this assumes you are using 128k RAM or more, so the cpc6128 driver is used.
Create a blank 3" floppy disk, to be used as a CP/M work disk
Boot the CPC driver, with the HD20 expansion enabled, and the just created HD image mounted.
Use MAME's File Manager to create a floppy disk image (MFM or MFI format), and then re-mount the image to make sure it is open in read-write mode.
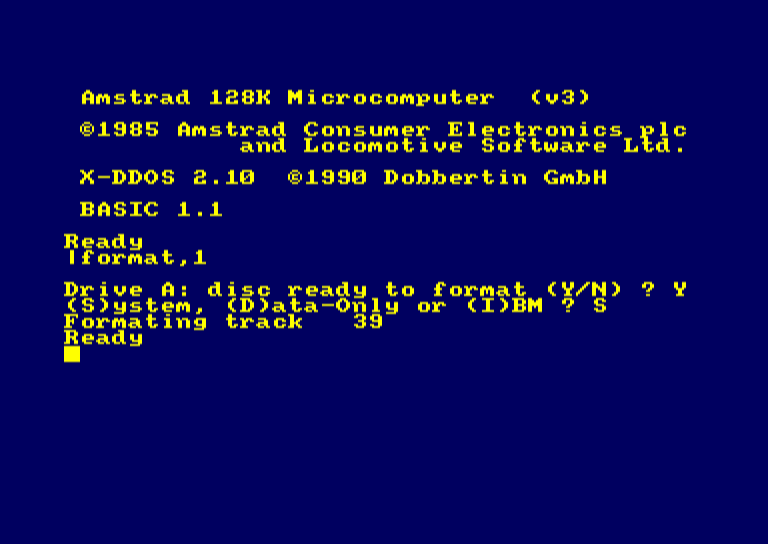
At the Ready prompt, enter |format,1 and press Enter. Then press Y to confirm you want to format a disk, then S for System disk, and wait for the format to be complete.
Make the disk bootable
First, mount the CPM 2.2 master disk via MAME's File Manager. Then, at the Ready prompt, type |syscopy,1,1 and press Enter.
When asked for the source disk, press any key. When asked for the destination disk, PAUSE, and use MAME's File Manager to mount the work disk (this is to work around UI inputs bleeding into emulation). Unpause (and R to retry in case you get any error), and now the disk should be bootable.
Copy some CP/M and HD utilities to the work disk
Mount the CP/M 2.2 master disk, and also mount our work disk in the second disk drive, and boot it by entering |cpm and pressing Enter.
Now you need to copy PIP.COM, MOVCPM.CPM, DDT.COM, and SYSGEN.COM from the CP/M 2.2 disk to the work disk. Enter the following commands at the A> prompt, pressing Enter after each one:
pip b:=pip.com
pip b:=ddt.com
pip b:=movcpm.com
pip b:=sysgen.com
Copy utilities and driver from the HD interface disk to the work disk
Mount the work disk in the first disk drive, and the HD interface disk in the second drive. Then enter each of the following commands:
pip a:=badtrack.com
pip a:=hdformat.com
pip a:=writesys.com
pip a:=cpm63.sys
Update the work disk to use CPM63.SYS
Restart MAME without the HD20 enabled, and mount the CP/M 2.2 master disk, and boot it using |cpm,1 at the Ready prompt.
Now mount the work disk, and enter writesys cpm63.sys at the A> prompt.
When asked for:
Source disk - press Enter
Drive to write to - press A
Destination disk - press Enter
System disk - press Enter.
No disk swapping needed. :)
Enter the following commands at the A> prompt:
movcpm 255 *
save 34 cpm63.com
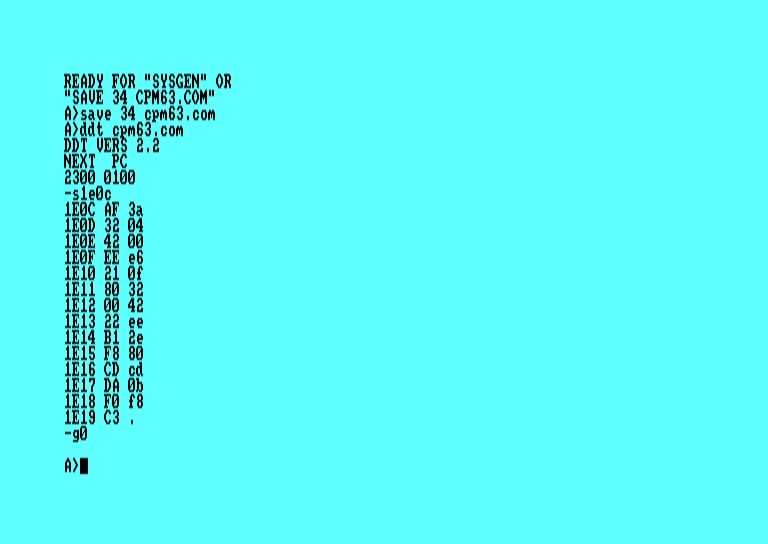
Now enter ddt cpm63.com and then at the '-' prompt, type s1e0c and press Enter.
Now you must enter the string of bytes to edit.
Type in the following byte values, pressing Enter after each one.
3a 04 00 e6 0f 32 42 ee 2e 80 cd 0b f8
Now type a '.' and press Enter to stop editing, then at the '-' prompt, type g0 and press Enter.
Type sysgen * and press Enter.
When asked for the destination disk, press Enter.
When asked for the system disk, pause, and then mount the CP/M 2.2 master disk. (Or you can just press Enter and let it crash).
Now you can reset the system, and boot from the work disk with |cpm,1.
Partitioning and formatting the hard disk
Boot from our CP/M 2.2 work disk (HDFORMAT.COM does not appear to work under CP/M Plus), with the HD20 enabled, and hard disk image mounted.
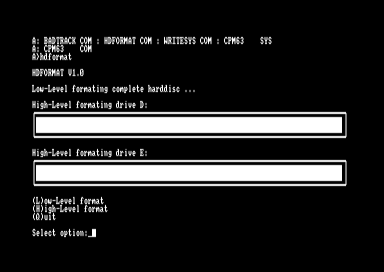
At the A> prompt, type hdformat, and press Enter. You will be given the option of doing a low-level format, a high-level format, or quit.
First press L to do a low-level format. This creates the partition table, providing four 5MB partitions (both X-DDOS and CP/M refer to them as drives D, E, F and G).
Press Y to confirm, and then Space to create the partition table.
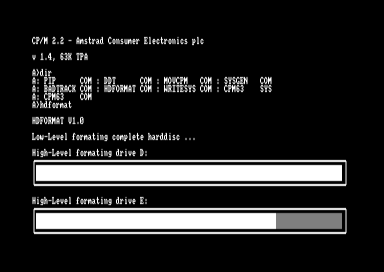
Next, press H to do a high-level format, press D to format drive D, then Y to confirm, and then Space to start formatting. Repeat this for each of the drives, then press Q to quit.
 |
 |
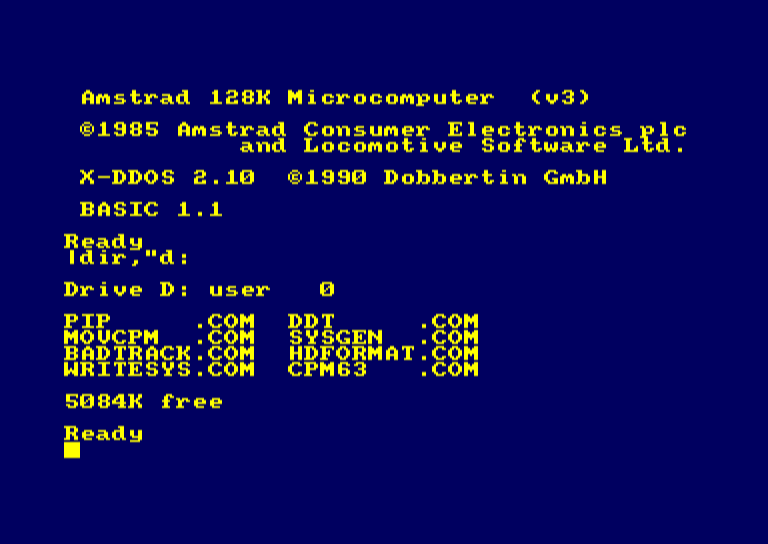
Now you can test it by copying some files to drive D. Resetting the system to go back to BASIC, you should be able to list files you copied by entering |dir,"d:", and it should report about 5MB of free space.
