Driver:CT486: Difference between revisions
m (Added missing HDD geometry) |
No edit summary |
||
| (8 intermediate revisions by one other user not shown) | |||
| Line 78: | Line 78: | ||
[http://www.pdos.org PDOS Homepage] | [http://www.pdos.org PDOS Homepage] | ||
For reference the chd converted from the vhd: [http://busse.biz/pdos.zip PDOS Boot Harddisk This Harddisk uses 2560 Cylinders,:16 Heads and :50 Sectors] this disk needs a device with lba support - ct486 does not have support for lba even with lba_enhancer board installed (did not work for me at least in Mme 0.240) | |||
[http://www.pdos.org/pdosflop.img PDOS Boot Floppy Disk] boot this with | |||
<code> | |||
<pre> | |||
cd <your Mame Directory> | |||
mame ct486 -flop1 pdosflop.img -ramsize 64M | |||
</pre> | |||
</code> | |||
This | This should result in | ||
[[File:PDOS_on_ct486.png |640px|PDOS on Mame]] | |||
* Note: you might have to enter BIOS once and set Floppy A: to 3.5inch 1.44MB | |||
== See also == | |||
*[[Driver:IBM PCs]] | |||
*[[System-Specific Setup and Information]] | |||
[[Category:Year_1993]] | |||
Latest revision as of 22:32, 12 April 2025
Stage 1: ct486 PC driver setup for all OSes
Handy things to have include:
- Preformatted blank 2GB and 4GB hard disk images.
- A DOS 7.1 boot disk with third party CD-ROM drivers.
Step 1: Extract the hard disk images. Make a copy of one of them named after the OS you're going to install, such as win2k.chd. (For Win 95/98/ME you must use the 2GB disk only as a source!)
Step 2: Start the ct486 driver with the following minimal options: -ramsize 64M -hard1 win2k.chd (or whatever you named it).
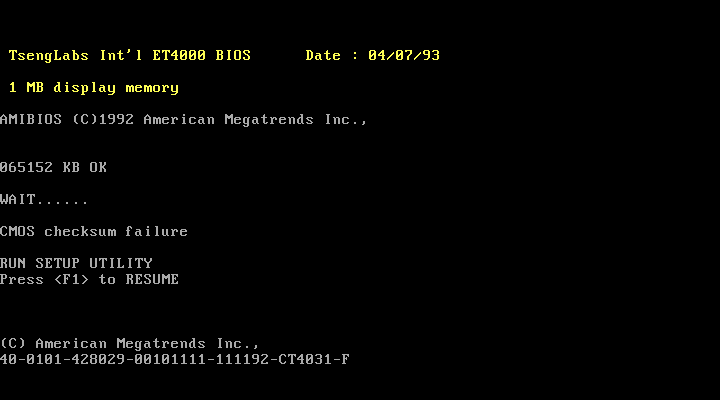
If you are starting from clear NVRAM, you'll see this message. Press F1 to enter SETUP. If you have previously used the driver, press DEL to enter SETUP during the RAM count-up.
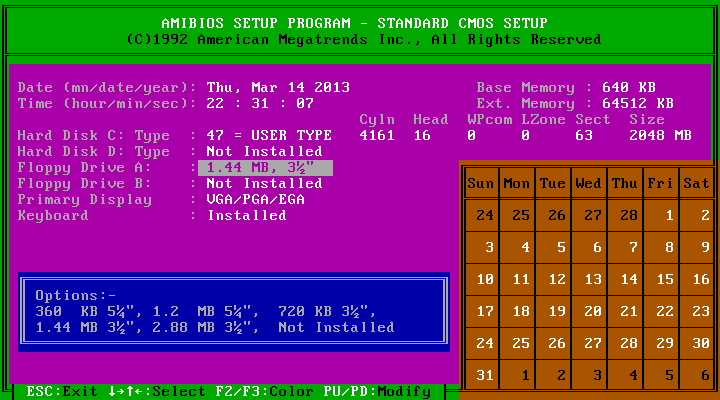
- Choose the first option "STANDARD CMOS SETUP" and press Enter twice, skipping the dire warning.
- Setup the date and time to current and move the cursor down to the Hard Disk C: Type.
- Press Page Up to get type 47 USER TYPE.
- Use the right arrow and number keys to change Cyln to 4161 (2GB) or 8322 (4GB), Head to 16 and Sect to 63. Do not change WPcom or Lzone.
- Select Floppy Drive A and press PAGE UP/PAGE DOWN until it's set to "1.44 MB 3 1/2".
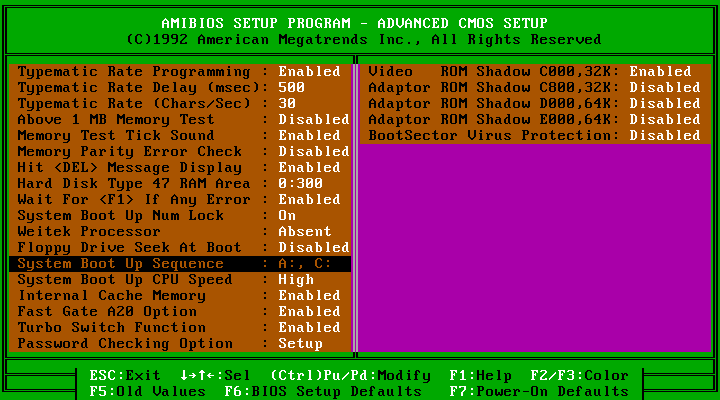
- Press Esc and choose ADVANCED CMOS SETUP. Press Enter to skip the warning screen once again and scroll down to System Boot Up Sequence.
- Press PAGE UP/PAGE DOWN to select "A: C:" as shown
- Press Esc.
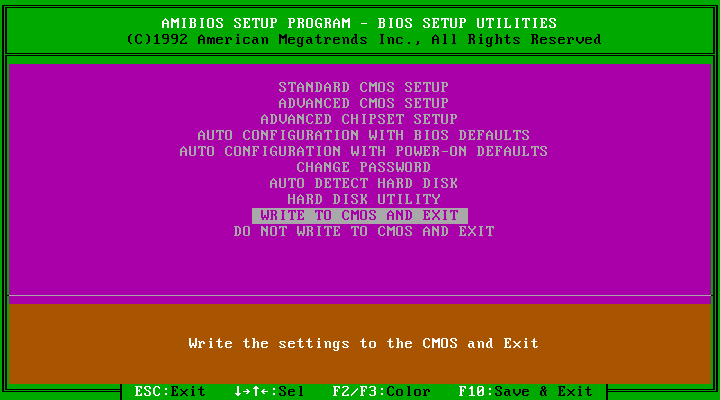
- Choose WRITE TO CMOS AND EXIT and press Enter. Confirm when it asks if you really want to.
Congrats, ct486 is now configured! Additional OS-specific instructions will follow.
Windows 2000 installation
...coming soon...
DESQview/X
...coming soon...
Damn Small Linux LiveCD
...coming soon...
Slackware 3.x
...coming soon...
OS/2 Warp 3.0
1. Get install CD from https://archive.org/details/IBMOS2Warp3Collection -- "IBM OS2 Warp 3 - Red - 8.162 - English - CDROM.zip" and extract it.
2. Create blank 500 MB hard disk image (installer will treat larger disks as empty)
chdman createhd --compression none --output os2warp3.chd --chs 1015,16,63
3. Start ct486 emulation and follow BIOS setup guide as described above, but set hard disk geometry to (1015 cylinders, 16 heads, 63 sectors).
mame ct486 -ram 16m -isa2 sblaster_16 -board3:ide:ide:1 cdrom -hard1 os2warp3.chd -cdrom os2cdrom.iso -flop1 INSTALL.DSK
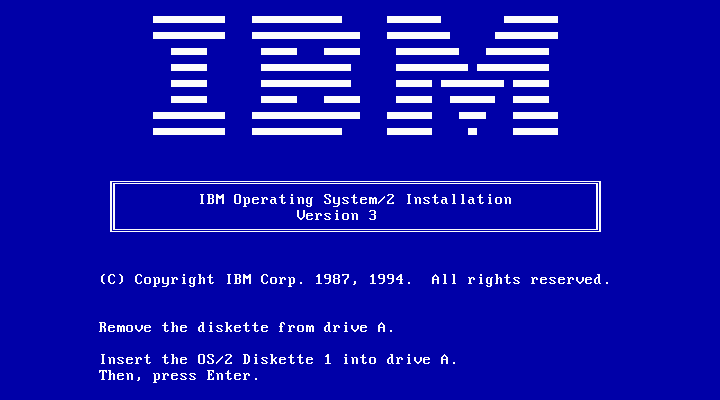
4. Installer starts booting from floppy (INSTALL.DSK). Use MAME file manager to replace floppy disk image with DISK1.DSK when prompted:
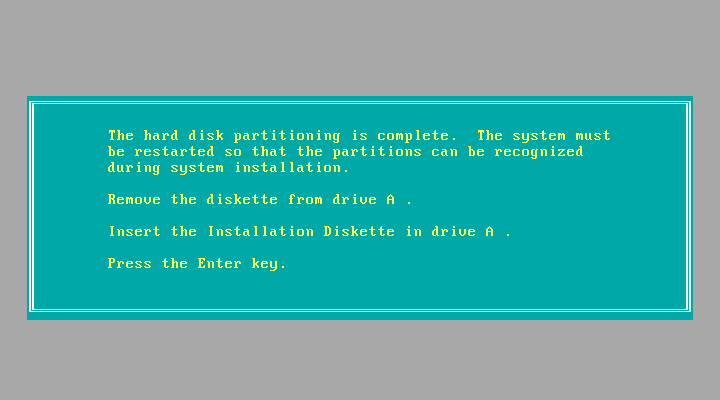
5. Installer continues. Choose 'Advanced installation' and 'Accept predefined installation partition'. Change diskettes using file manager, as prompted.
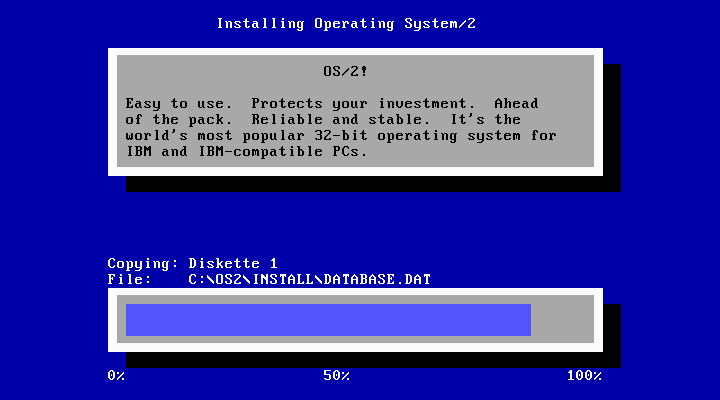
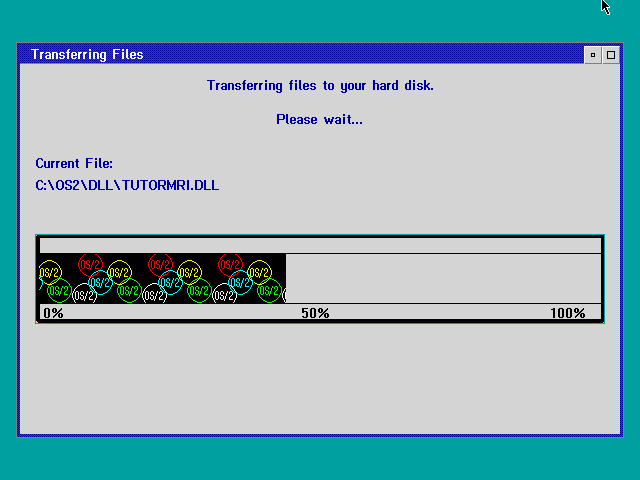
6. Installer continues after reboot. Choose 'Easy installation' to sit back and relax while OS/2 installs on your computer.
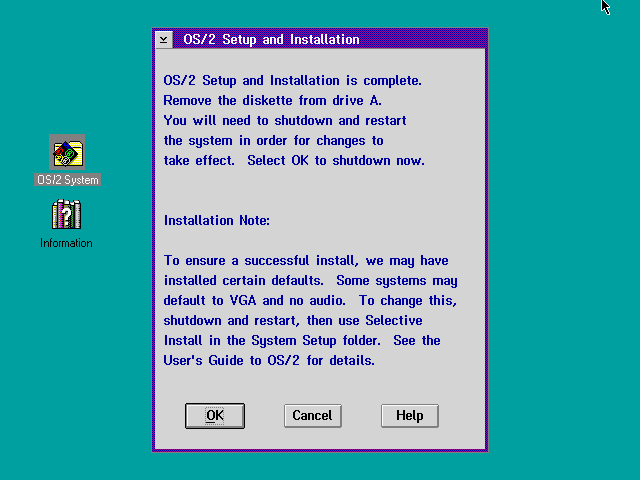
7. OS/2 boots to the 'System Configuration' screen. Click OK to continue installation; do not install a printer and accept default multimedia settings.
8. Once install completes, shut down using right mouse button click on desktop (OK button does nothing). OS/2 is ready for use.
PDOS
For reference the chd converted from the vhd: PDOS Boot Harddisk This Harddisk uses 2560 Cylinders,:16 Heads and :50 Sectors this disk needs a device with lba support - ct486 does not have support for lba even with lba_enhancer board installed (did not work for me at least in Mme 0.240)
PDOS Boot Floppy Disk boot this with
cd <your Mame Directory>
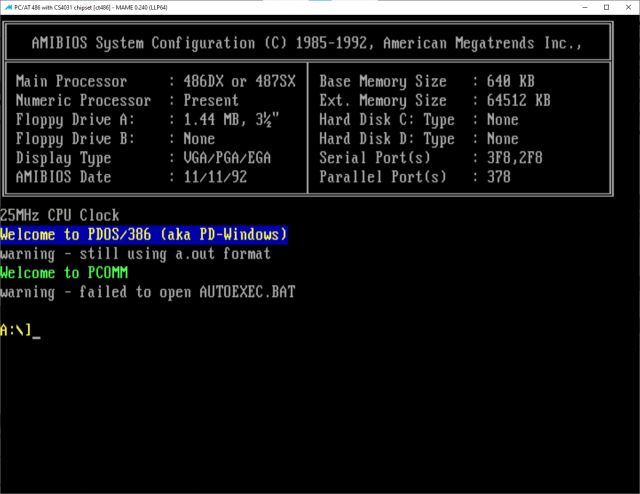
mame ct486 -flop1 pdosflop.img  -ramsize 64M
This should result in
- Note: you might have to enter BIOS once and set Floppy A: to 3.5inch 1.44MB
