Driver:FMTowns
Installing TownsOS
You will need: - Towns System Software v2.1L51 operating system CD image (software list shortname: tss2151)
1. Create a hard disk image
- First, create a blank hard disk image using chdman.
./chdman createhd -o <path to HD image file> -c none -chs 768,16,16
The CHS values are up to you, they only affect the size of the disk image, the example given will give about a 100MB image. The geometry itself is irrelevant for the FM-Towns as hard disks are SCSI. -c none is also important, as this disables compression, but allows direct writing to the image data (compressed CHDs are read-only). If you've used the fmtowns driver before, it might be easier if you move or delete all the files in the nvram/fmtowns folder. This will clear all CMOS settings, which may interfere with some things.
2. Boot TownsOS and run installation program
- Start MAME, with the Towns System Software CD and your newly created hard disk image mounted in -cdrom and -hard1 slots respectively.
./mame64 fmtowns -cdrom tss2151 -hard1 <path to HD image file>
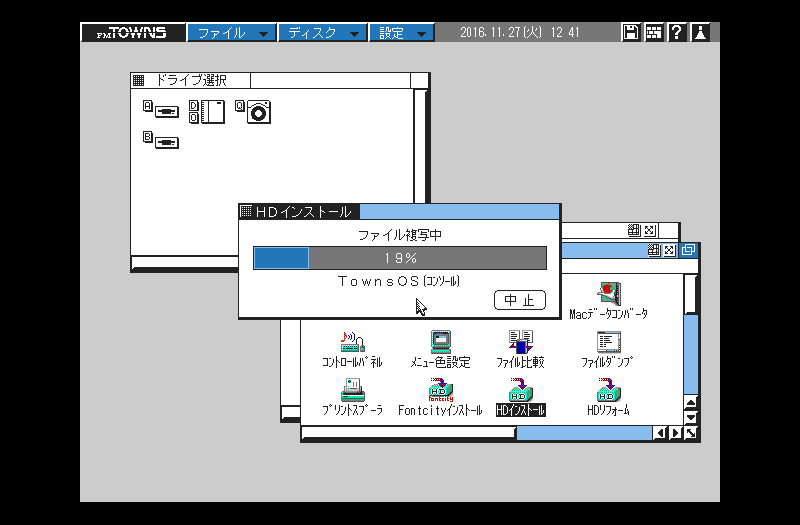
The emulated system should now start to boot from the CD image. Once at the GUI, double-click the ツール (tool) icon in the TOWNSSYSTEM window. In the new window that appears, double-click the HDインストール (HD install) icon (highlighted in this screenshot):
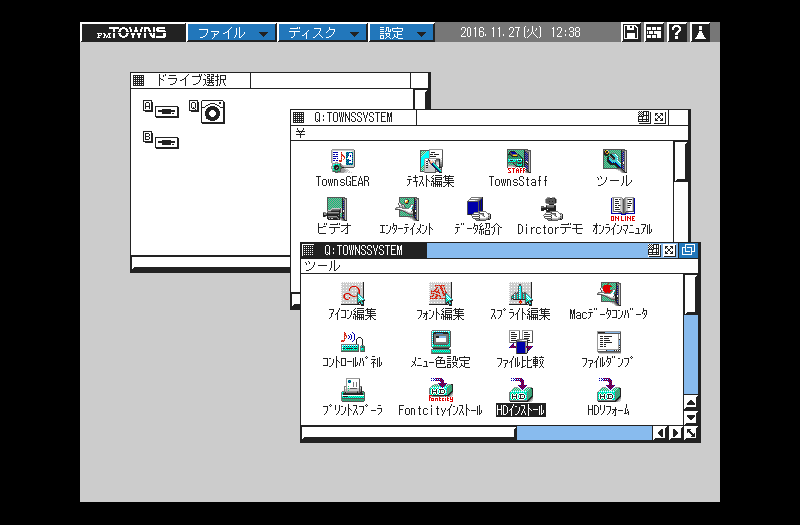
- A dialog will apear, asking the OS to install, either TownsOS or Windows 3.1. Select TownsOS, then click the emboldened button. Now you should see this dialog:
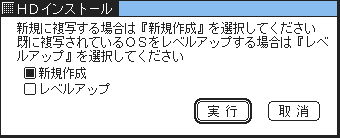
Make sure the first option is selected, and click the emboldened button. The second option is likely used for upgrading an existing TownsOS installation.
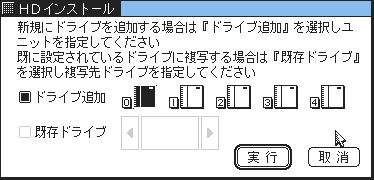
- Next select the hard disk to install to. As the disk drive is unformatted, no drive letters are assigned to any HDs, so you must select disk unit number. Numbers are assigned to each physical SCSI HD, from 0 to 4. MAME's -hard1 slot refers to HD unit 0, so click on that icon to select it (it will display inverted, so you know which unit is selected), as shown below, and then click the emboldened button.
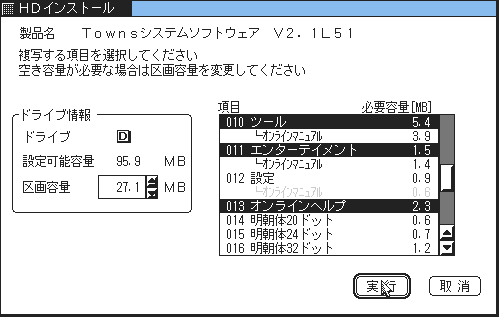
- Now you can select which parts of TownsOS you wish to install. You may select multiple items, so long as there is enough space available on the HD image (100MB is plenty). The only required feature is "TownsOS (コンソール)".
Clicking the emboldened button will then bring up a summary of the features to be installed, including the HD unit to install to (should be 0), the drive letter to use for the system drive (it will assign D: for you if there is no other HD drives on the systems), the disk size, and the size of the install. Click the emboldenend button to continue.
- Now the system will partition and format the drive for you, and then it will reboot.
3. Boot TownsOS from HD, and complete installation
- Once back in the GUI, you'll now see a new icon for drive D on the initial window. But first, we need to copy the OS files to the new drive. Open the ツール window, and double-click the HDインストール icon once again. The installation process should now begin.
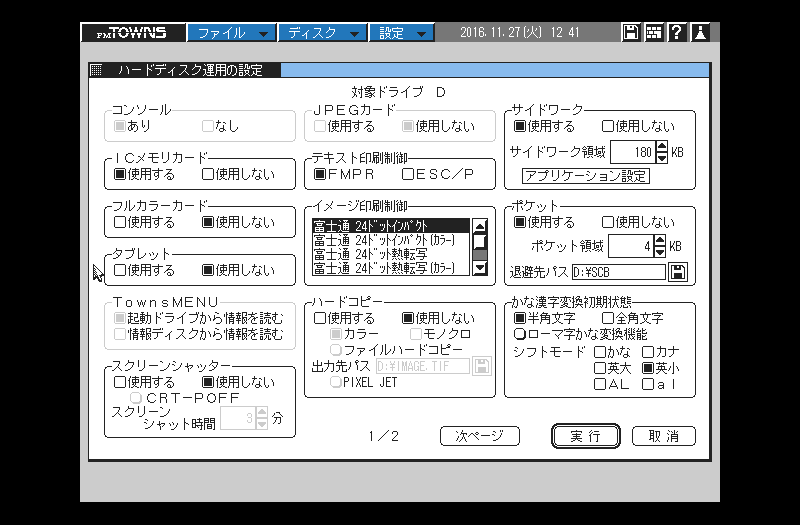
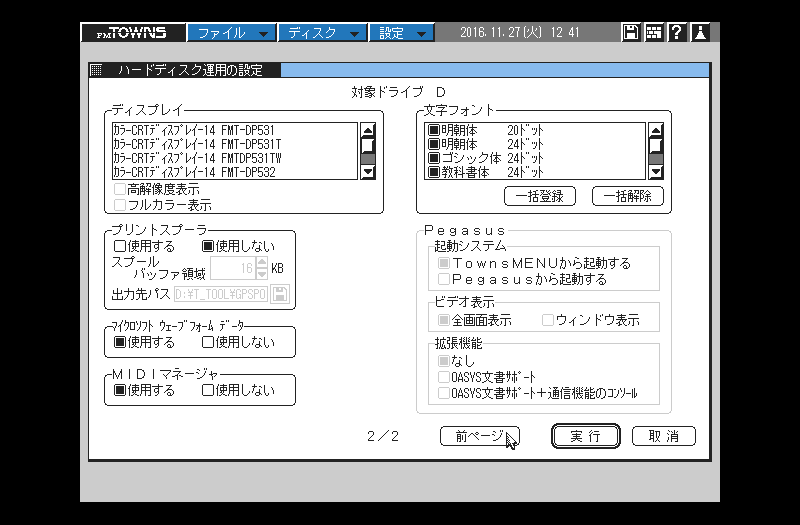
- Once copying is finished, you'll be presented with a customisation dialog. Do note that there are two pages to this dialog, you can switch between them by clicking the left-most button at the bottom of the dialog. Settings can be left as they are, but it is useful to enable the IC memory card driver (click the left option in the ICメモリカード frame on page 1), this will add the loading of the memory card driver to CONFIG.SYS, so that you don't have to.
- Clicking the emboldened button will confirm the settings you've chosen, and will display this dialog:
This is simply stating that you need to reset the system. Click the button, and the installation is complete. To reset the system, select the last item in the FMTowns menu (button in the top-left of the screen), and click the left button (リセット = reset). The system will now reboot, from the HD (you may unmount the CD image now, if you want).
Disk partitioning and formatting under TownsOS
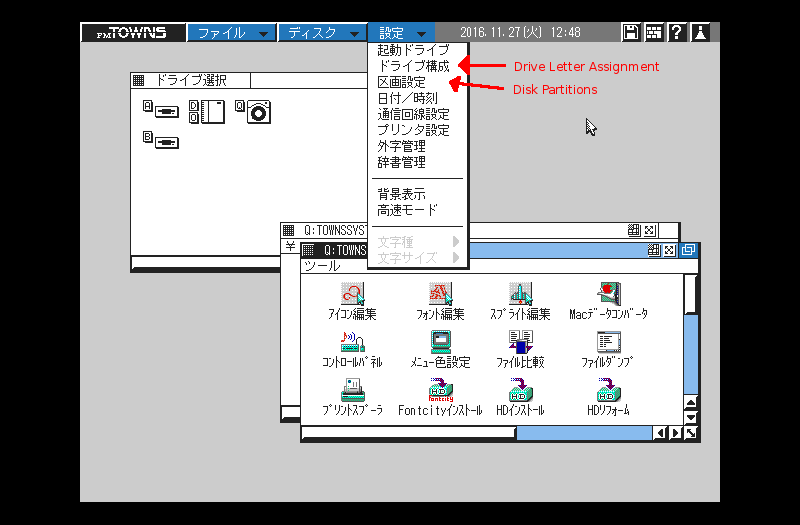
After installing TownsOS, you'll likely want to use the rest of the hard disk for storage. You can do this before installing TownOS, if you wish, but do note that MS-DOS partitions are limited to 127MB in size, splitting up the OS and other areas on the disk is a good idea. Partitioning is done in the second and third items in the last menu, as shown in in this screenshot:
Firstly, you'll need to select the second menu item, and assign an extra drive letter to HD unit 0. Click the HD unit 0 icon (there will already be a grey D symbol there signifying that drive D is assigned to this HD. You'll see a dialog with two options, leave the top option selected, and click the emboldened button. This will add the a new drive letter (should be E) to the HD. Choosing the bottom option in the previous dialog will remove a drive letter assignment. Drive assignments should now look like this:
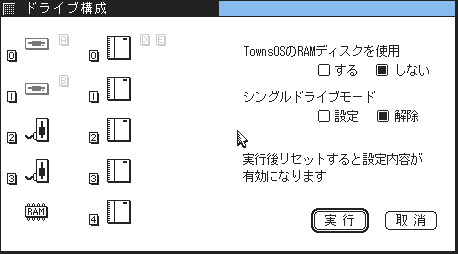
Drive assignments are stored in CMOS, so you'll need to restart TownsOS for the changes to take effect. As before, the last item on the FMTowns menu is exit, and click the left button in the exit dialog to reset.
Once back in the GUI, you can select the third item in the last menu, which will set up disk partitions. You'll see one partition already setup for TownsOS itself. Click the label for the second partition, and name it anything you wish. The next option is partition type, select MS-DOS here. The next option is the bootable flag, this will already be active for the TownsOS partition, and you don't want to change this, so leave it alone. The next option is the size of the partition, clicking this will bring up a dialog to adjust it. Clicking the ALL button will automatically use all remaining space on the disk, up to 127MB (the maximum size of MS-DOS partitions). When done, you should see a partition table similar to this:
Clicking the emboldened will bring up a confirmation dialog, clicking the emboldened button there will write the partition table to the HD. Clcik the non-emboldened button to close the partitioning program.
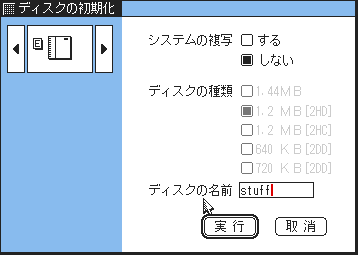
Formatting a drive can be found under the first item in the ディスク (disk) menu. Selecting it will bring up this dialog:
Use the arrow button in the top-left to select which drive to format - note that you cannot select the drive that TownsOS is installed on. The options on the right are:
- Copy system files to disk (default is to not copy system files)
- Disk format (enabled for floppy drives only)
- Disk volume label
Clicking the emboldened button will start the formatting process. Once done, you can store anything you wish on the HD.
Important note: By default, folders will appear in an icon view, showing shortcuts to applications and so on. To get a plain file list view, click the icon in the top right-hand corner of the window, and select the second menu item,
