Driver:HP300: Difference between revisions
No edit summary |
mNo edit summary |
||
| (4 intermediate revisions by one other user not shown) | |||
| Line 3: | Line 3: | ||
'''Notes''': | '''Notes''': | ||
* This manual applies to MAME 0.204 and later | * This manual applies to MAME 0.204 and later | ||
The 9000/370 was almost identical to the 9000/360 except its 68030 processor operated at 33 MHz (instead of 25 MHz), and it offered a maximum memory configuration of 48 MB, instead of 16 MB. | |||
The Model 375 (98574B, $20,995) came in the standard 300 Series cabinet (short) with two available DIO-II slots. Like the 345, the 375 came with a 68030 processor and 68882 coprocessor, both running at 50 MHz. | |||
== Networking == | |||
See [[Driver:Apollo#Networking]] | |||
== Software Installation == | == Software Installation == | ||
| Line 35: | Line 43: | ||
[https://archive.org/details/gnu-hpux9.00-v1.0 GNU toolchain and utilities] | [https://archive.org/details/gnu-hpux9.00-v1.0 GNU toolchain and utilities] | ||
=== How to create a new disk image file === | |||
* to create a new 1900 MB disk image use chdman utility from MAME package | |||
$ chdman createhd -f -o hpuxtest.chd -s $[1900*1048576] | |||
=== Installation guide === | |||
$ mame64 hp9k370 -sl2 98643 -hard hpuxtest.chd -rp . -window -mouse -uimodekey DEL -cdrom hpux9_install.iso | |||
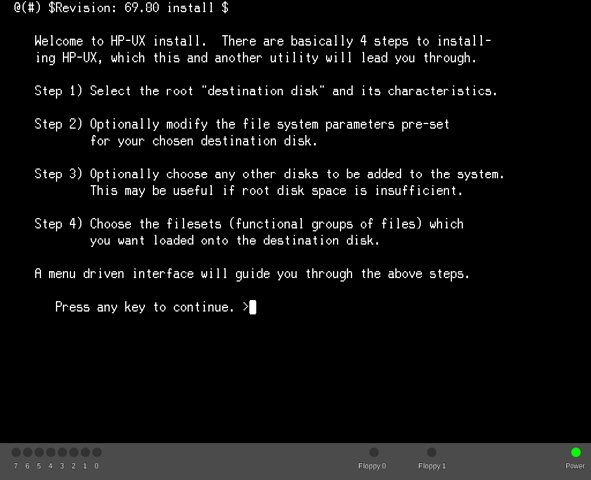
This will boot the installer: | |||
[[File:hpux9_install1.png]] | |||
Press <Enter> to continue: | |||
[[File:hpux9_install2.png]] | |||
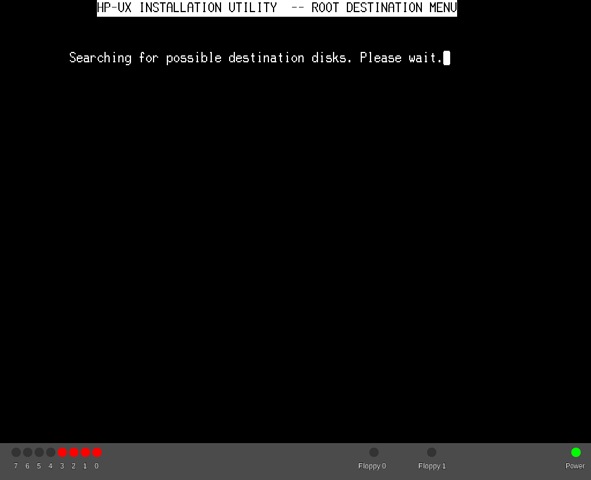
Installer searching for disks: | |||
[[File:hpux9_install3.png]] | |||
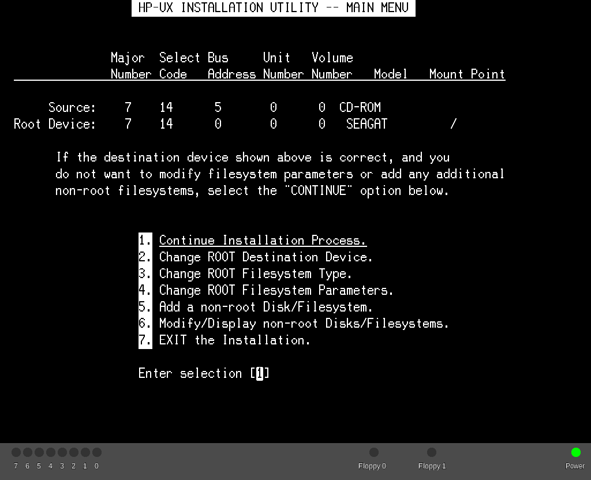
It found our disk image: | |||
[[File:hpux9_install4.png]] | |||
Say 'y' to have long file names: | |||
[[File:hpux9_install5.png]] | |||
Press '1' to continue: | |||
[[File:hpux9_install6.png]] | |||
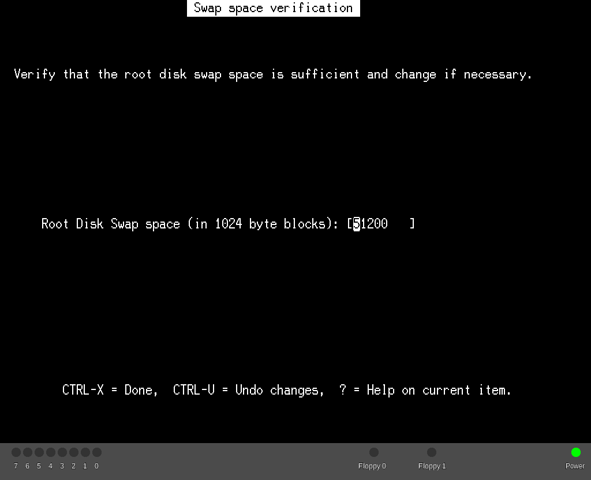
Accept the default swap setting by pressing enter: | |||
[[File:hpux_install7.png]] | |||
And, once again, press 'y' to continue | |||
Installer starts creating the filesystem: | |||
[[File:hpux9_install9.png]] | |||
Installer extracting the minimum HP-UX system: | |||
[[File:hpux9_install11.png]] | |||
The installer is now asking for the update CDROM: | |||
[[File:hpux9_install12.png]] | |||
Enter the Menu (DEL to activate UI, then Tab to enter menu), and select 'hpux_9.1.update.iso': | |||
[[File:hpux9_install13.png]] | |||
[[File:hpux9_install14.png]] | |||
Press Tab to close menu and DEL to deactivate UI mode | |||
After that is done, the installer shows the main menu, press enter to select all filesets: | |||
[[File:hpux9_install15.png]] | |||
Press Enter once again to confirm that you to install these filesets: | |||
[[File:hpux9_install16.png]] | |||
And, 'y' to really install: | |||
[[File:hpux9_install17.png]] | |||
And this is the final install screen. After it finishes install, it will reboot into HP-UX from hard disk. | |||
[[File:hpux9_install18.png]] | |||
=== Running VUE === | |||
Login as root and type | |||
$ init 3 | |||
After some time, it will start VUE session | |||
[[File:hpux9_vue.png|591px]] | |||
[[Category:Year_1985]] | |||
[[Category:Year_1987]] | |||
[[Category:Year_1988]] | |||
[[Category:Year_1989]] | |||
[[Category:Year_1991]] | |||
Latest revision as of 22:08, 19 February 2023
MAME HP 9000/370 Howto
Notes:
- This manual applies to MAME 0.204 and later
The 9000/370 was almost identical to the 9000/360 except its 68030 processor operated at 33 MHz (instead of 25 MHz), and it offered a maximum memory configuration of 48 MB, instead of 16 MB.
The Model 375 (98574B, $20,995) came in the standard 300 Series cabinet (short) with two available DIO-II slots. Like the 345, the 375 came with a 68030 processor and 68882 coprocessor, both running at 50 MHz.
Networking
Software Installation
How to setup the ROMs
├── dio98550
│   └── 98550a.bin
├── hp9122c
│   └── 09122-15515.bin
├── hp9k370
│   ├── 1818-4416.bin
│   ├── 1818-4417.bin
├── human_interface
│   └── 1820-4784.bin
http://www.bitsavers.org/bits/HP/HP_9000/firmware/dio98550.zip
http://www.bitsavers.org/bits/HP/HP_9000/firmware/hp9122c.zip
http://www.bitsavers.org/pdf/hp/9000_300/firmware/9000_370.zip
http://www.bitsavers.org/bits/HP/HP_9000/firmware/hp9k380.zip
Installation images
http://bitsavers.org/bits/HP/HP_9000/HPUX_9/CD/hpux9_install.iso
http://bitsavers.org/bits/HP/HP_9000/HPUX_9/CD/hpux_9.1_update.iso
How to create a new disk image file
- to create a new 1900 MB disk image use chdman utility from MAME package
$ chdman createhd -f -o hpuxtest.chd -s $[1900*1048576]
Installation guide
$ mame64 hp9k370 -sl2 98643 -hard hpuxtest.chd -rp . -window -mouse -uimodekey DEL -cdrom hpux9_install.iso
This will boot the installer:
Press <Enter> to continue:
Installer searching for disks:
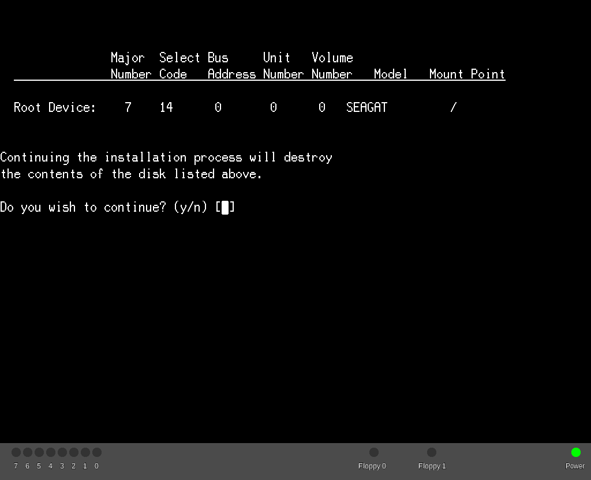
It found our disk image:
Say 'y' to have long file names:
Press '1' to continue:
Accept the default swap setting by pressing enter:
And, once again, press 'y' to continue
Installer starts creating the filesystem:
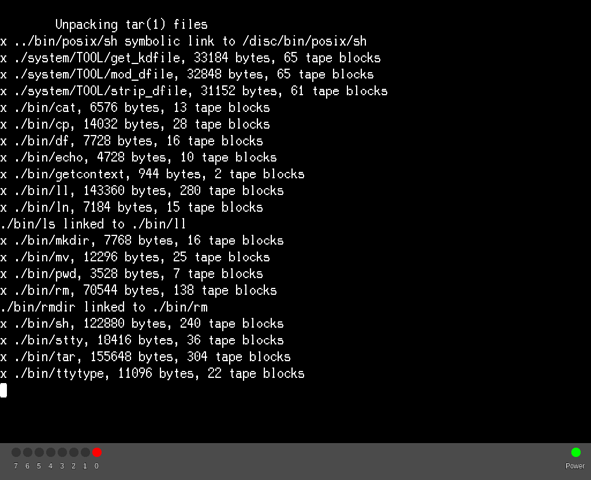
Installer extracting the minimum HP-UX system:
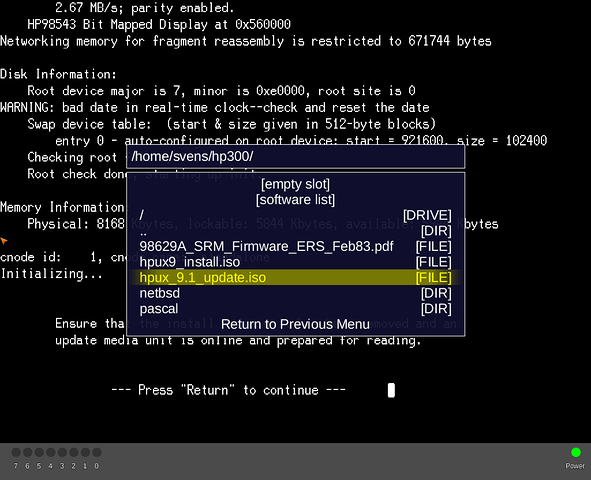
The installer is now asking for the update CDROM:
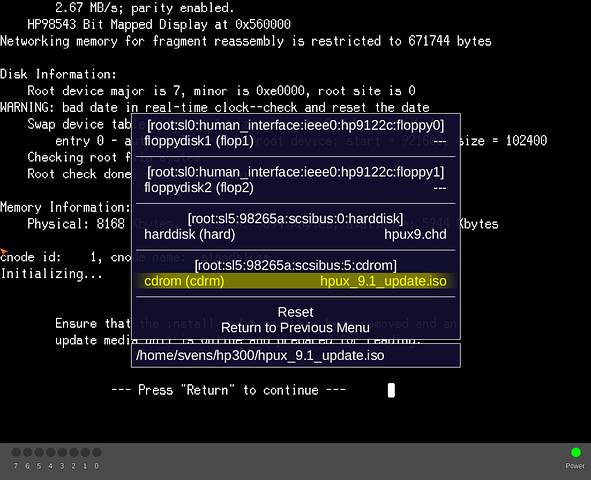
Enter the Menu (DEL to activate UI, then Tab to enter menu), and select 'hpux_9.1.update.iso':
Press Tab to close menu and DEL to deactivate UI mode
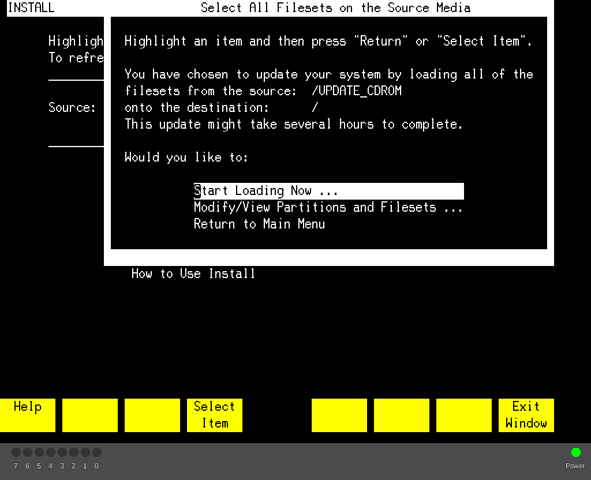
After that is done, the installer shows the main menu, press enter to select all filesets:
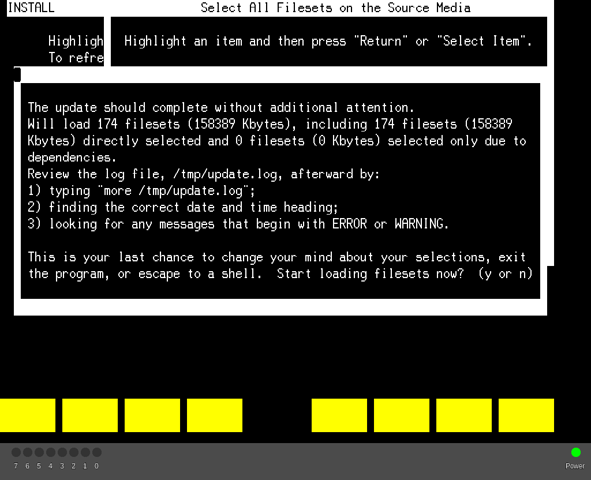
Press Enter once again to confirm that you to install these filesets:
And, 'y' to really install:
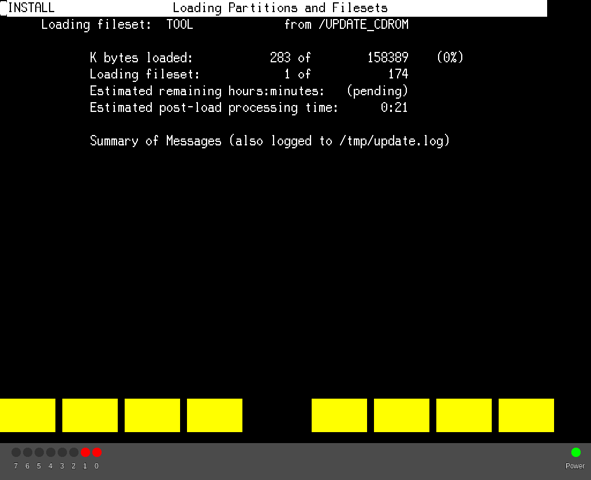
And this is the final install screen. After it finishes install, it will reboot into HP-UX from hard disk.
Running VUE
Login as root and type
$ init 3
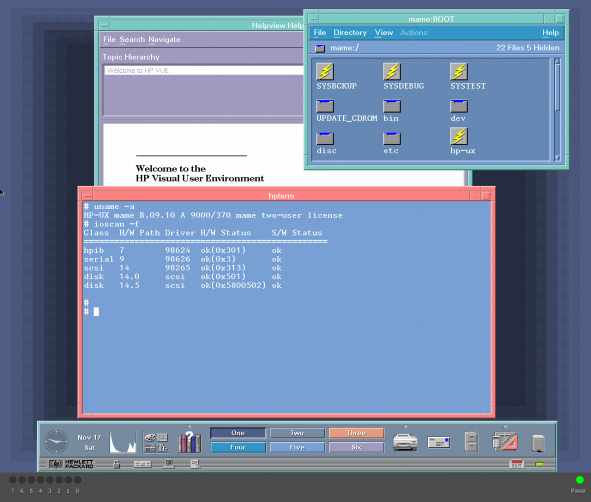
After some time, it will start VUE session

